Native Cloud-based Repositories
Cloud-based repositories natively supported by SP360 include the four most widely used repositories (i.e., Azure DevOps, Bitbucket, GitHub and GitLab).
This section describes the process of connecting SP360’s SAST capabilities with cloud-based repositories.
While the user interface within SP360 is identical for all supported cloud-based repositories, the prerequisites that need to be established vary from repository to repository. It is outside the scope of this help facility to describe how to establish these prerequisites within each repository, however, the table below describes the requirements:
| Azure DevOps | BitBucket | GitHub | GitLab | |
|---|---|---|---|---|
| Required Permissions | Any ONE of these permissions will suffice:
| All THREE permissions are required:
| Admin | Any ONE of these permissions will suffice:
|
| Best Practice | It is preferred, though not required that the Repository Account Owner connect to the repository. | |||
Note: Though one representative from the client can certainly do all these tasks, we would (a) expect an IT Engineer, Repository Admin or Manager to set up the appropriate permissions, and (b) either a developer or QA person to actually connect to repositories that need to be scanned.
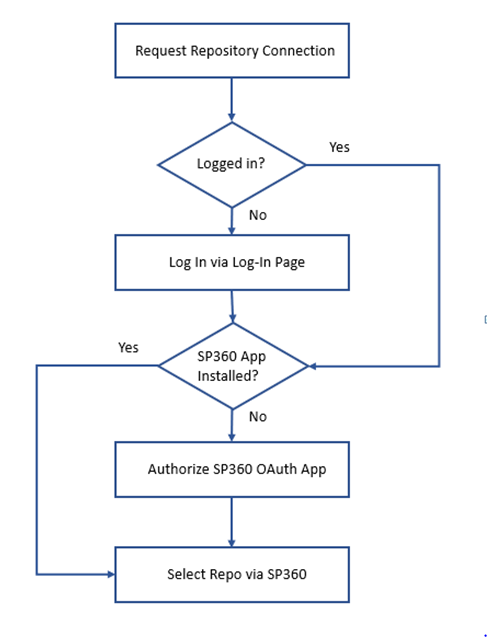
Repository Sync Process Flow Diagram
The process flow diagram below explains the required prerequisites that the user needs to establish to connect/scan any cloud-based repository.
Connecting and Scanning Cloud-based Repositories
Once the required prerequisites are established, the steps required to connect to and scan any cloud-based repository are the same.
Step 1: Click on the icon for the desired repository type at the top right (for example, Azure DevOps).

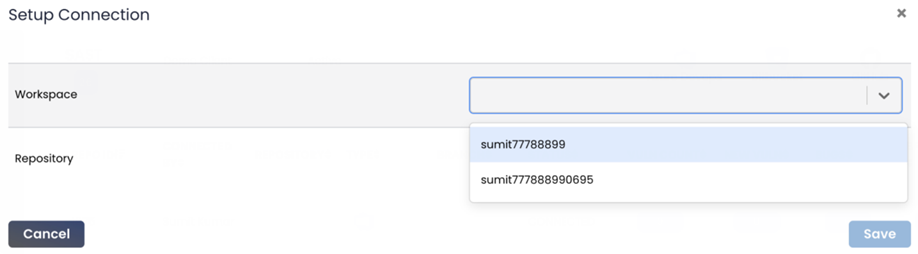
Step 2: Select the desired Workspace from the drop-down.
Step 3: After selecting a Workspace, a pop-up message indicates that the connection has been successfully updated.
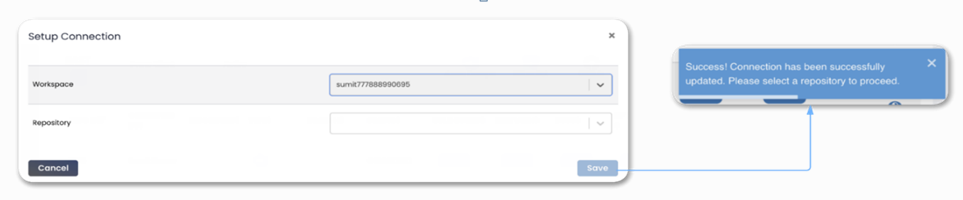
The repositories available within the chosen Workspace are displayed in a drop-down. Select the Repository to add for periodic scanning. After selecting a Repository, a pop-up message indicates that the connection has been successfully updated.

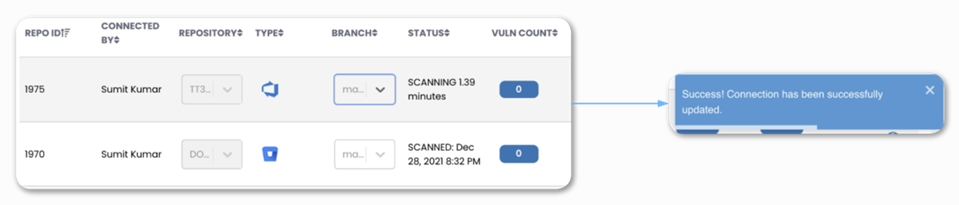
Step 4: The selected repository is added to the SAST grid.
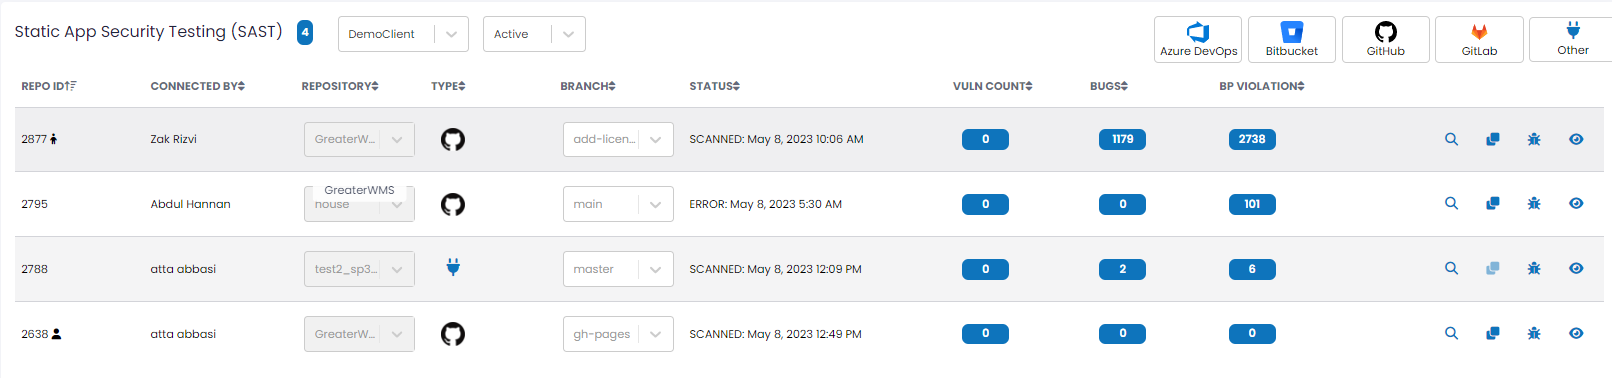
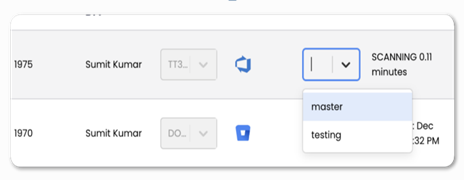
Step 5: A repository may have one or more Branches. SP360 connects to and scans one branch at a time, so it is required that a branch be selected from the drop-down in order to indicate the branch to be scanned.
Step 6: A pop-up message indicates that the connection has been successfully updated.
Note: It is possible for multiple branches within the same repository to be scanned. To accomplish this, the initial repository should be cloned, which adds another entry to the grid but without a branch selected. The additional branch can now be selected for this cloned repository. There is no limit to how many times a repository can be cloned.
The original repository will be marked as a “Parent” and the cloned repository as a “Child”. For more information, click here.