SAST Integration with GitHub
Security Program 360’s (SP360) Static Application Security Testing (SAST) functionality enables continuous code inspection by scanning source code and identifying potential security vulnerabilities, bugs, and best practice violations. SP360’s SAST functionality integrates with your existing workflow and enables continuous code inspection to ensure code quality and security integrity prior to deployment to customer accessible environments. This makes SP360’s SAST functionality an integral part of an integral part of a continuous integration regime.
This document describes the process of integrating SP360’s SAST with GitHub repositories.
To integrate SP360's SAST and scan the source code of an application and its components stored in the GitHub repository, you need to follow the steps below:
Step 1: Log into SP360 and click on the SAST option in the navigation menu on the left side.

Step 2: Click on the GitHub icon at the top right.
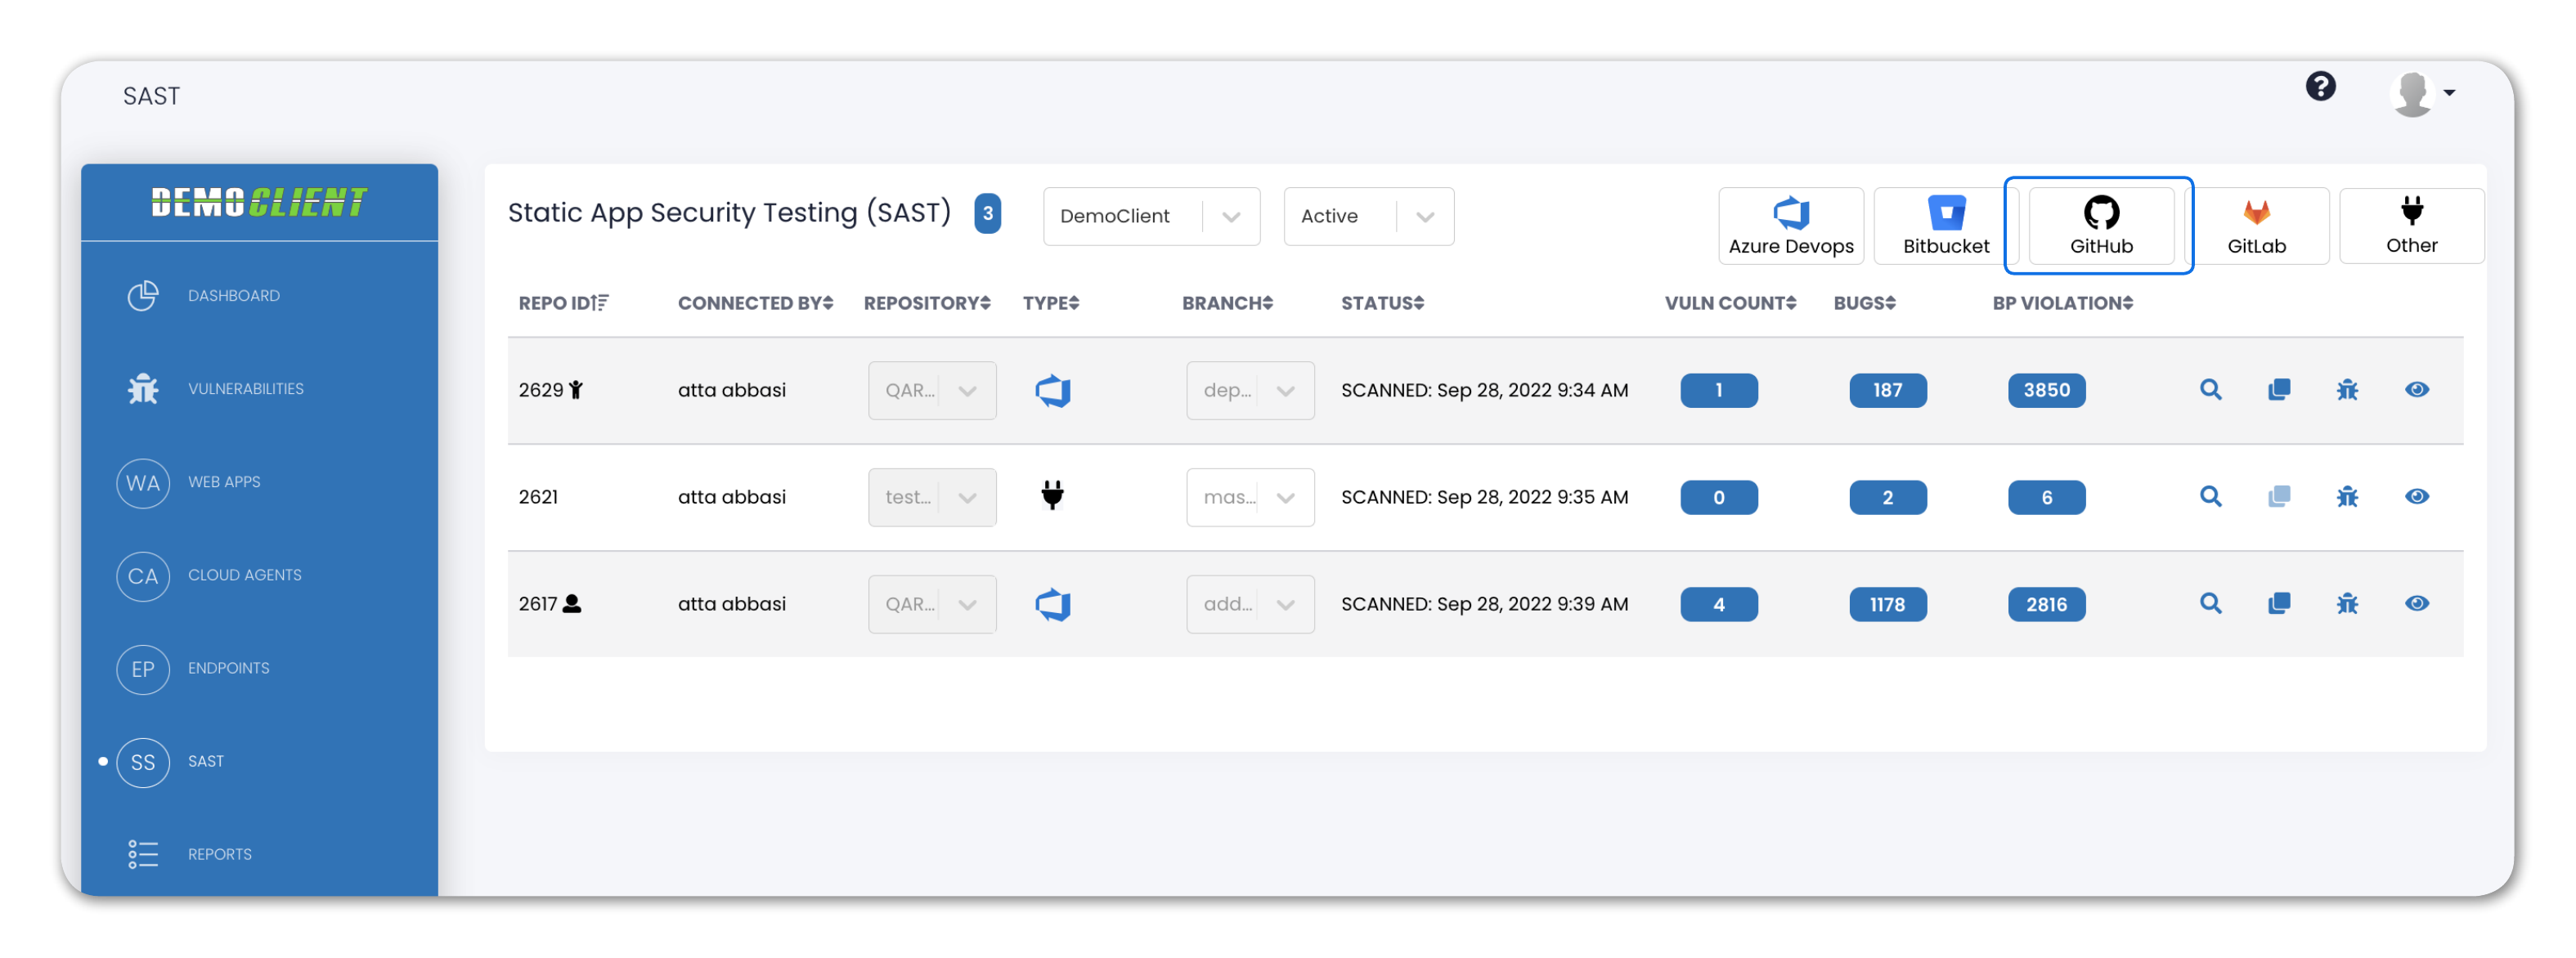
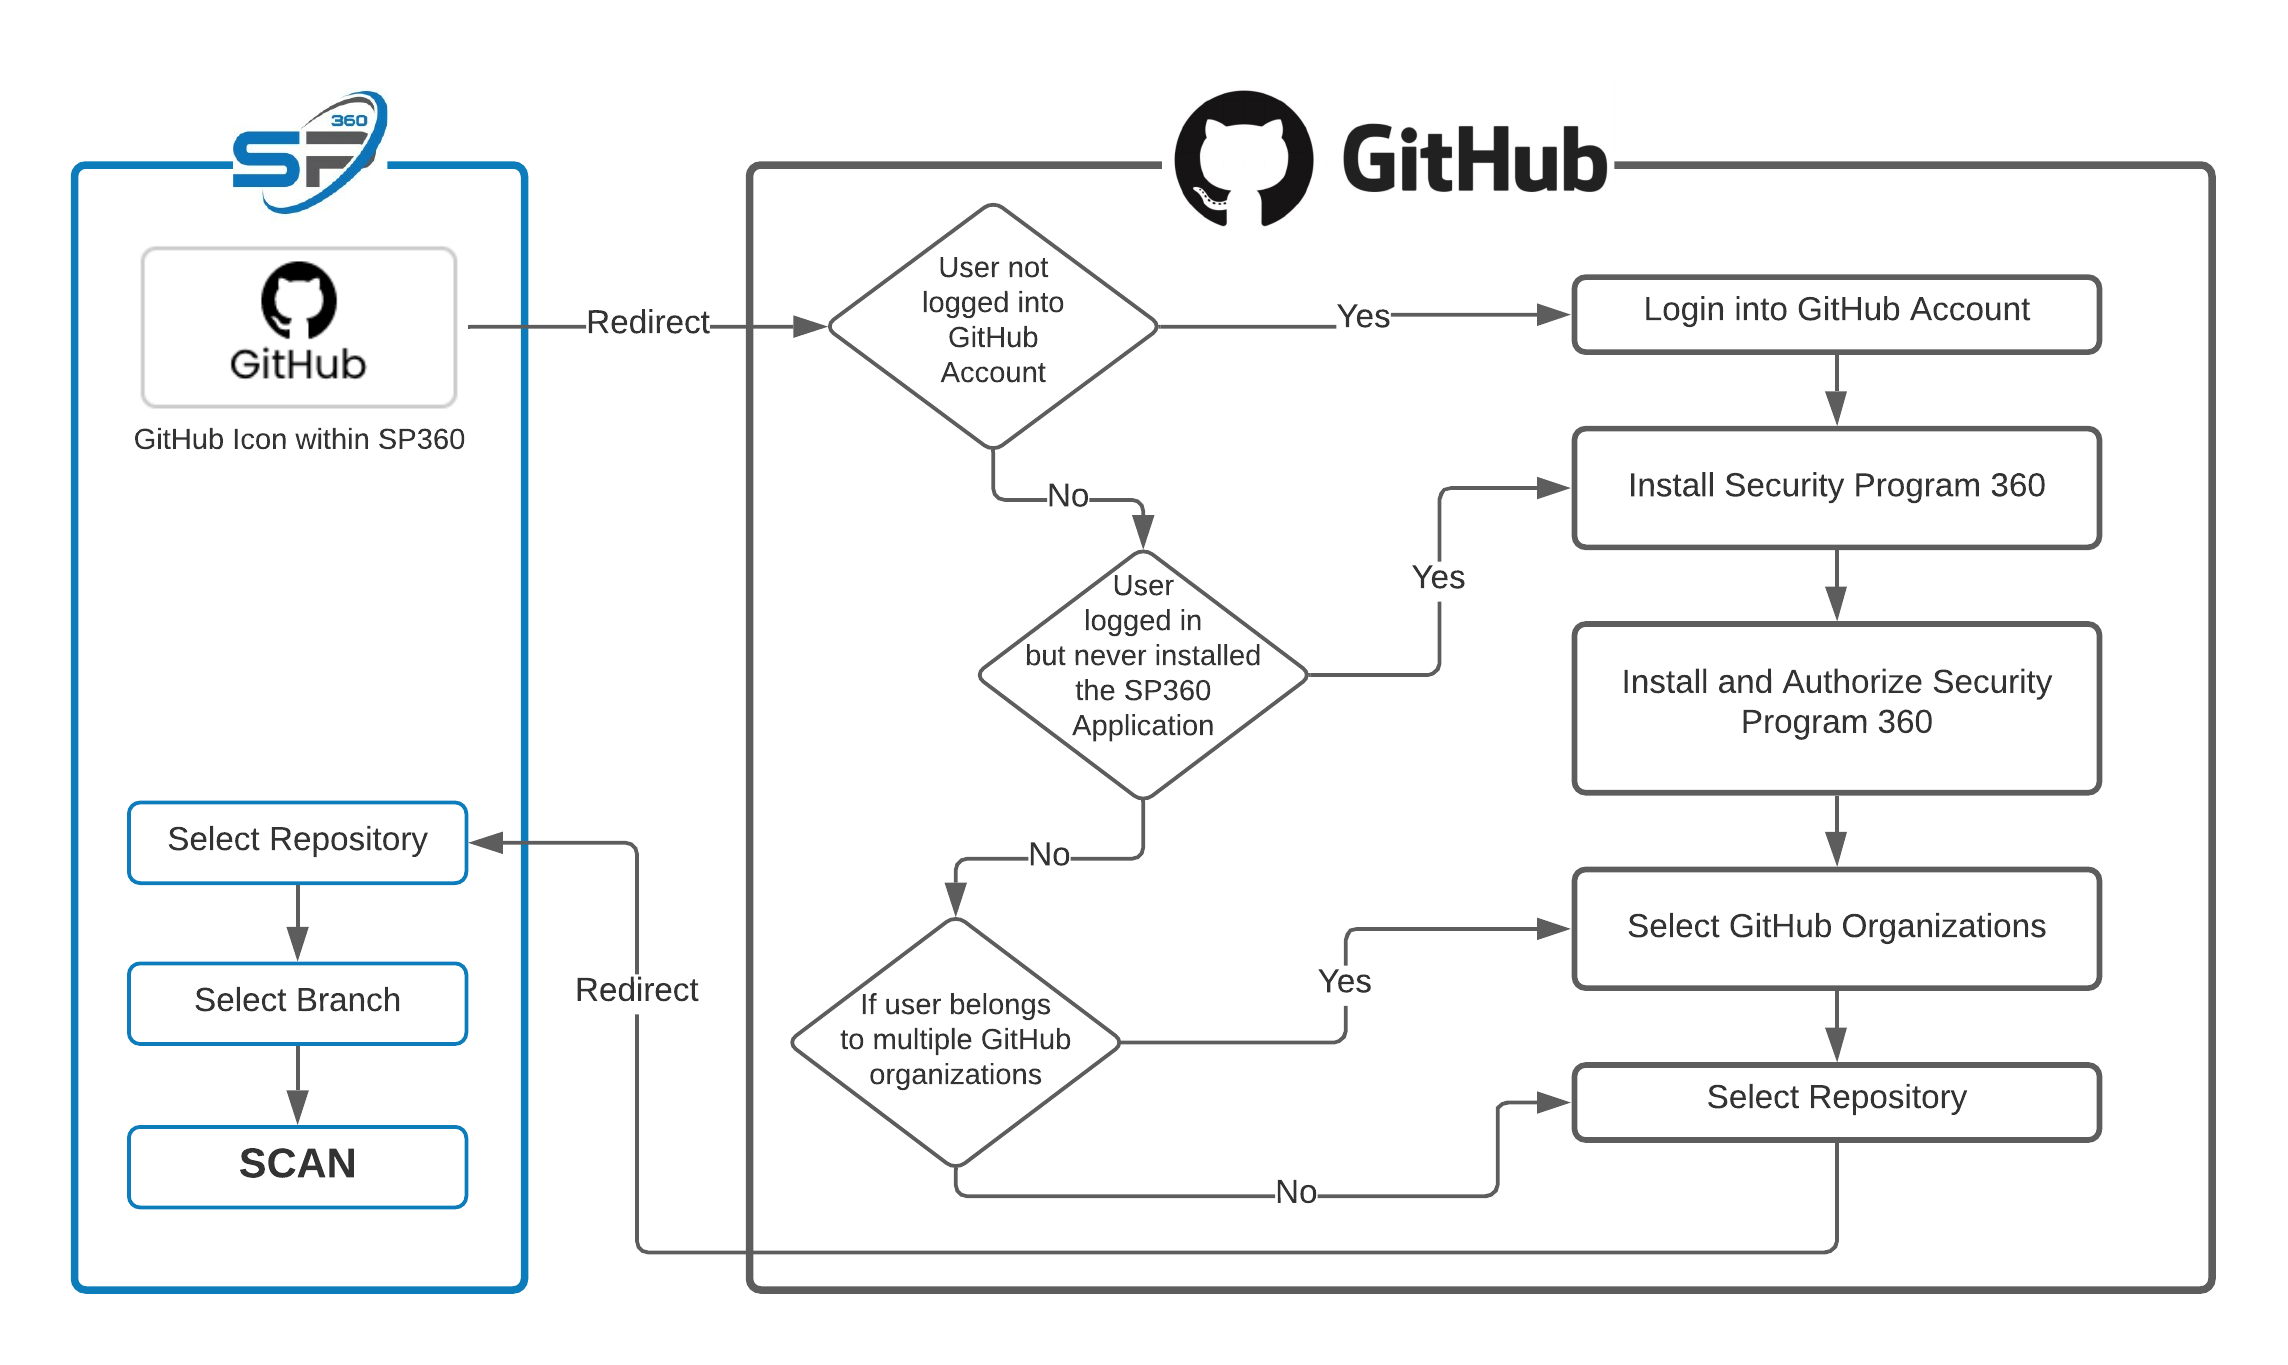
Clicking on the GitHub icon, will result in the following possible scenarios:
-
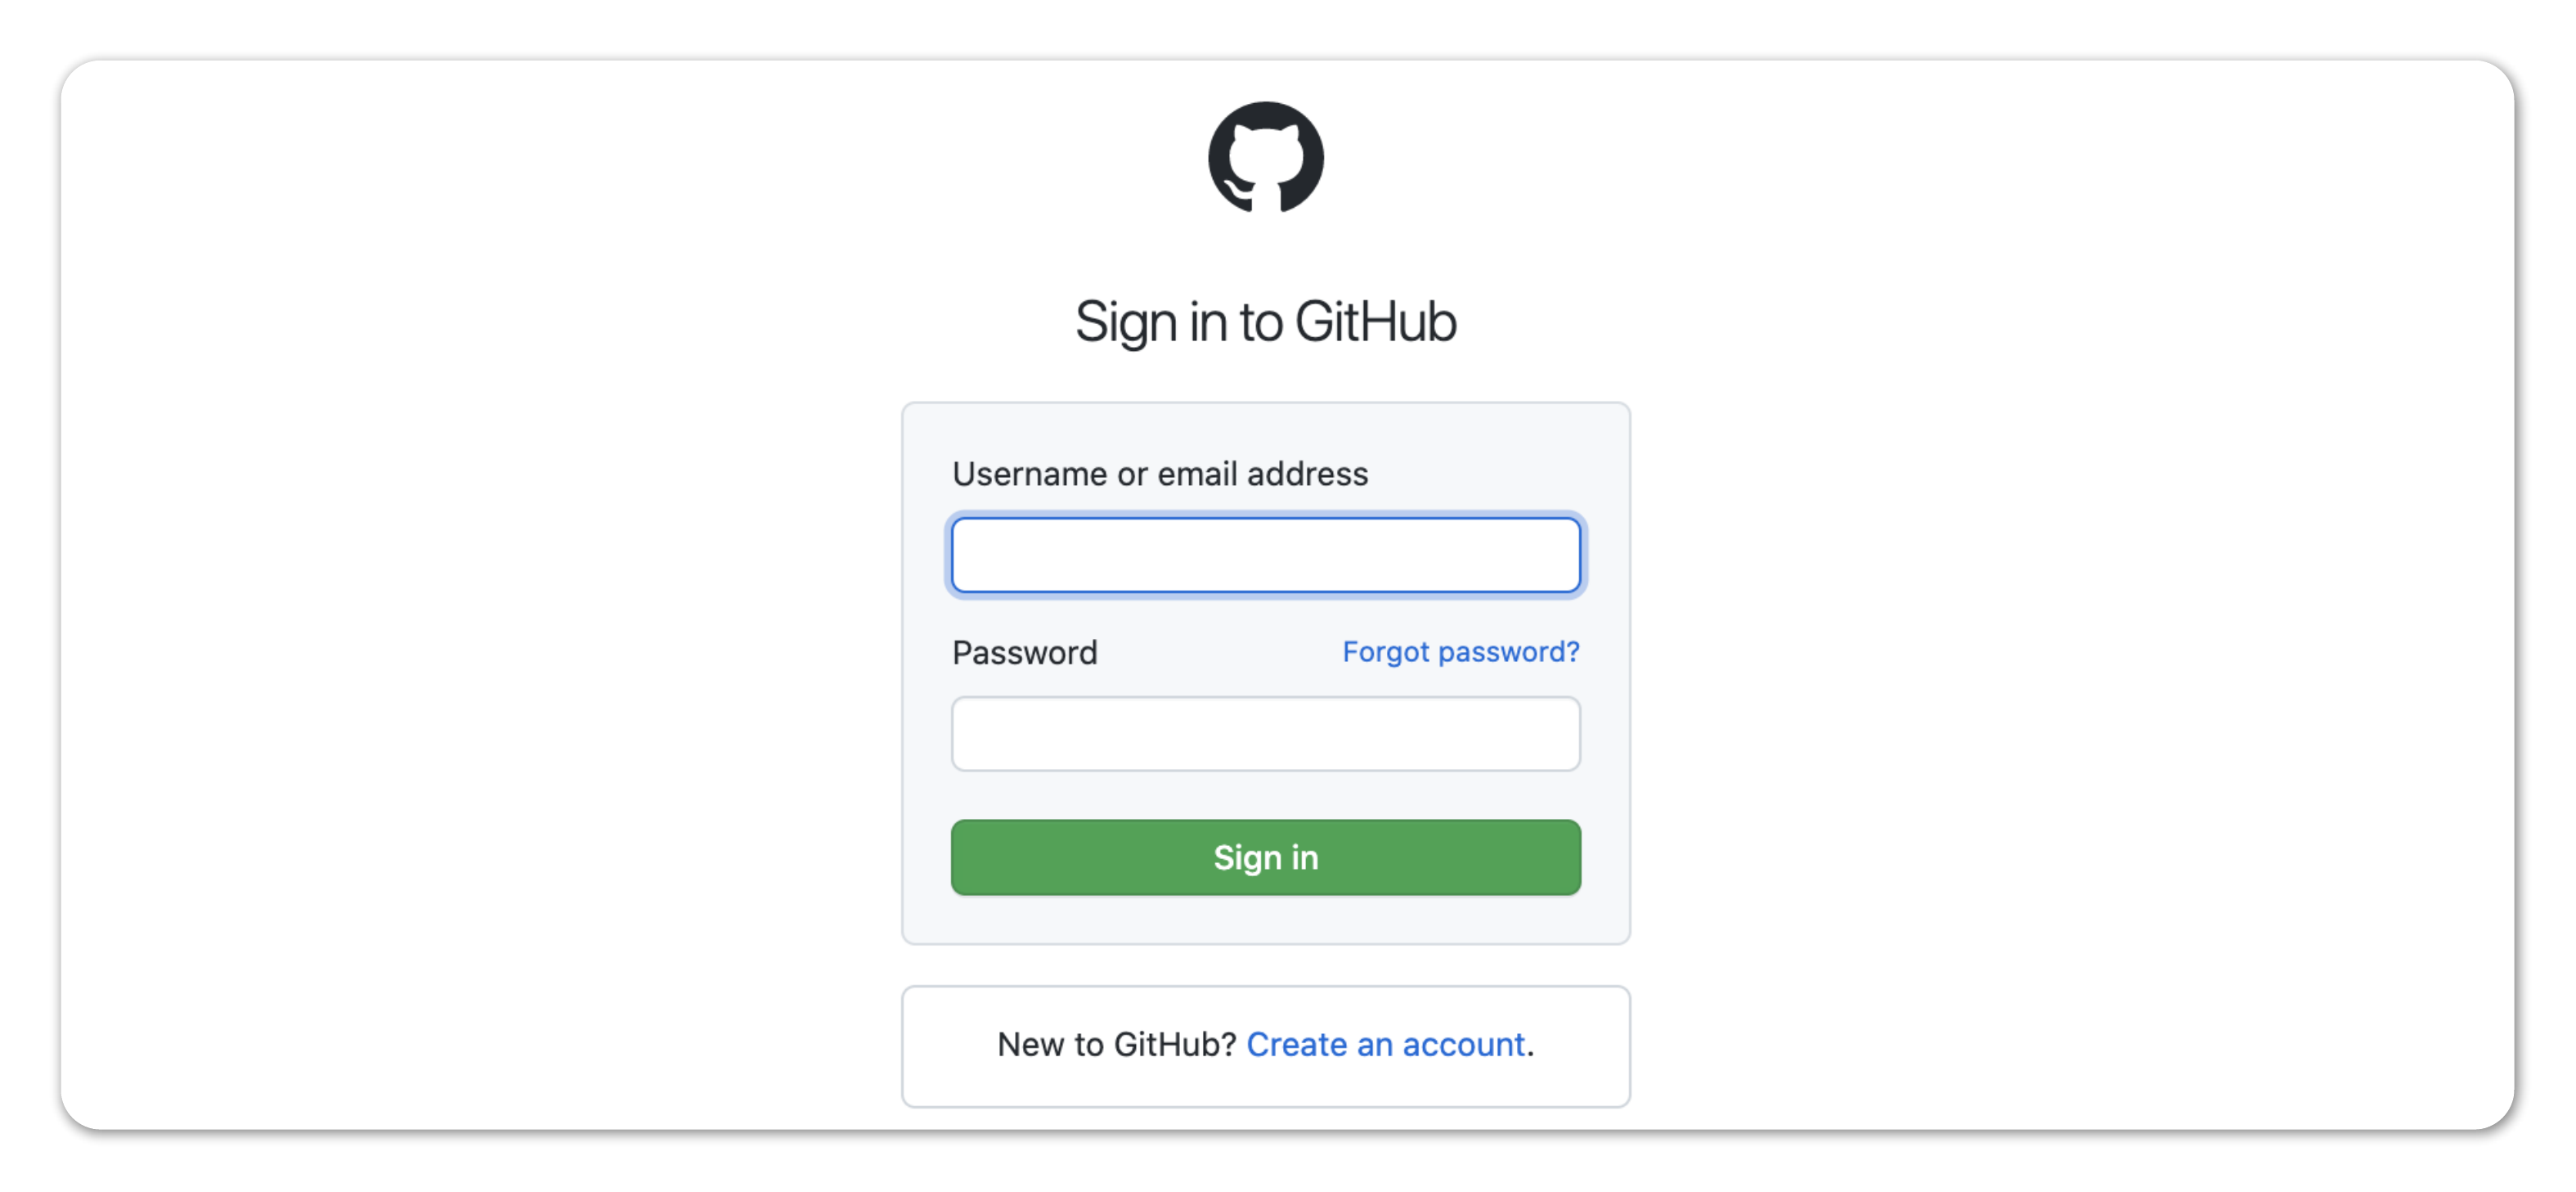
● If you are not logged into GitHub, the GitHub login page shown in Step 3 is displayed.
● If you are logged into GitHub but have never installed the SP360 GitHub application, you will be redirected to Step 4.
● If you are logged into GitHub and have previously installed the SP360 GitHub application and if you have multiple organizations within your GitHub account, then you will be redirected to Step 6.
Step 3: Now you will be asked to Sign-in to your respective GitHub account.
Step 4: When you sign into GitHub, you will be redirected to a GitHub page asking you to Install the Security Program 360 (GitHub) Application.
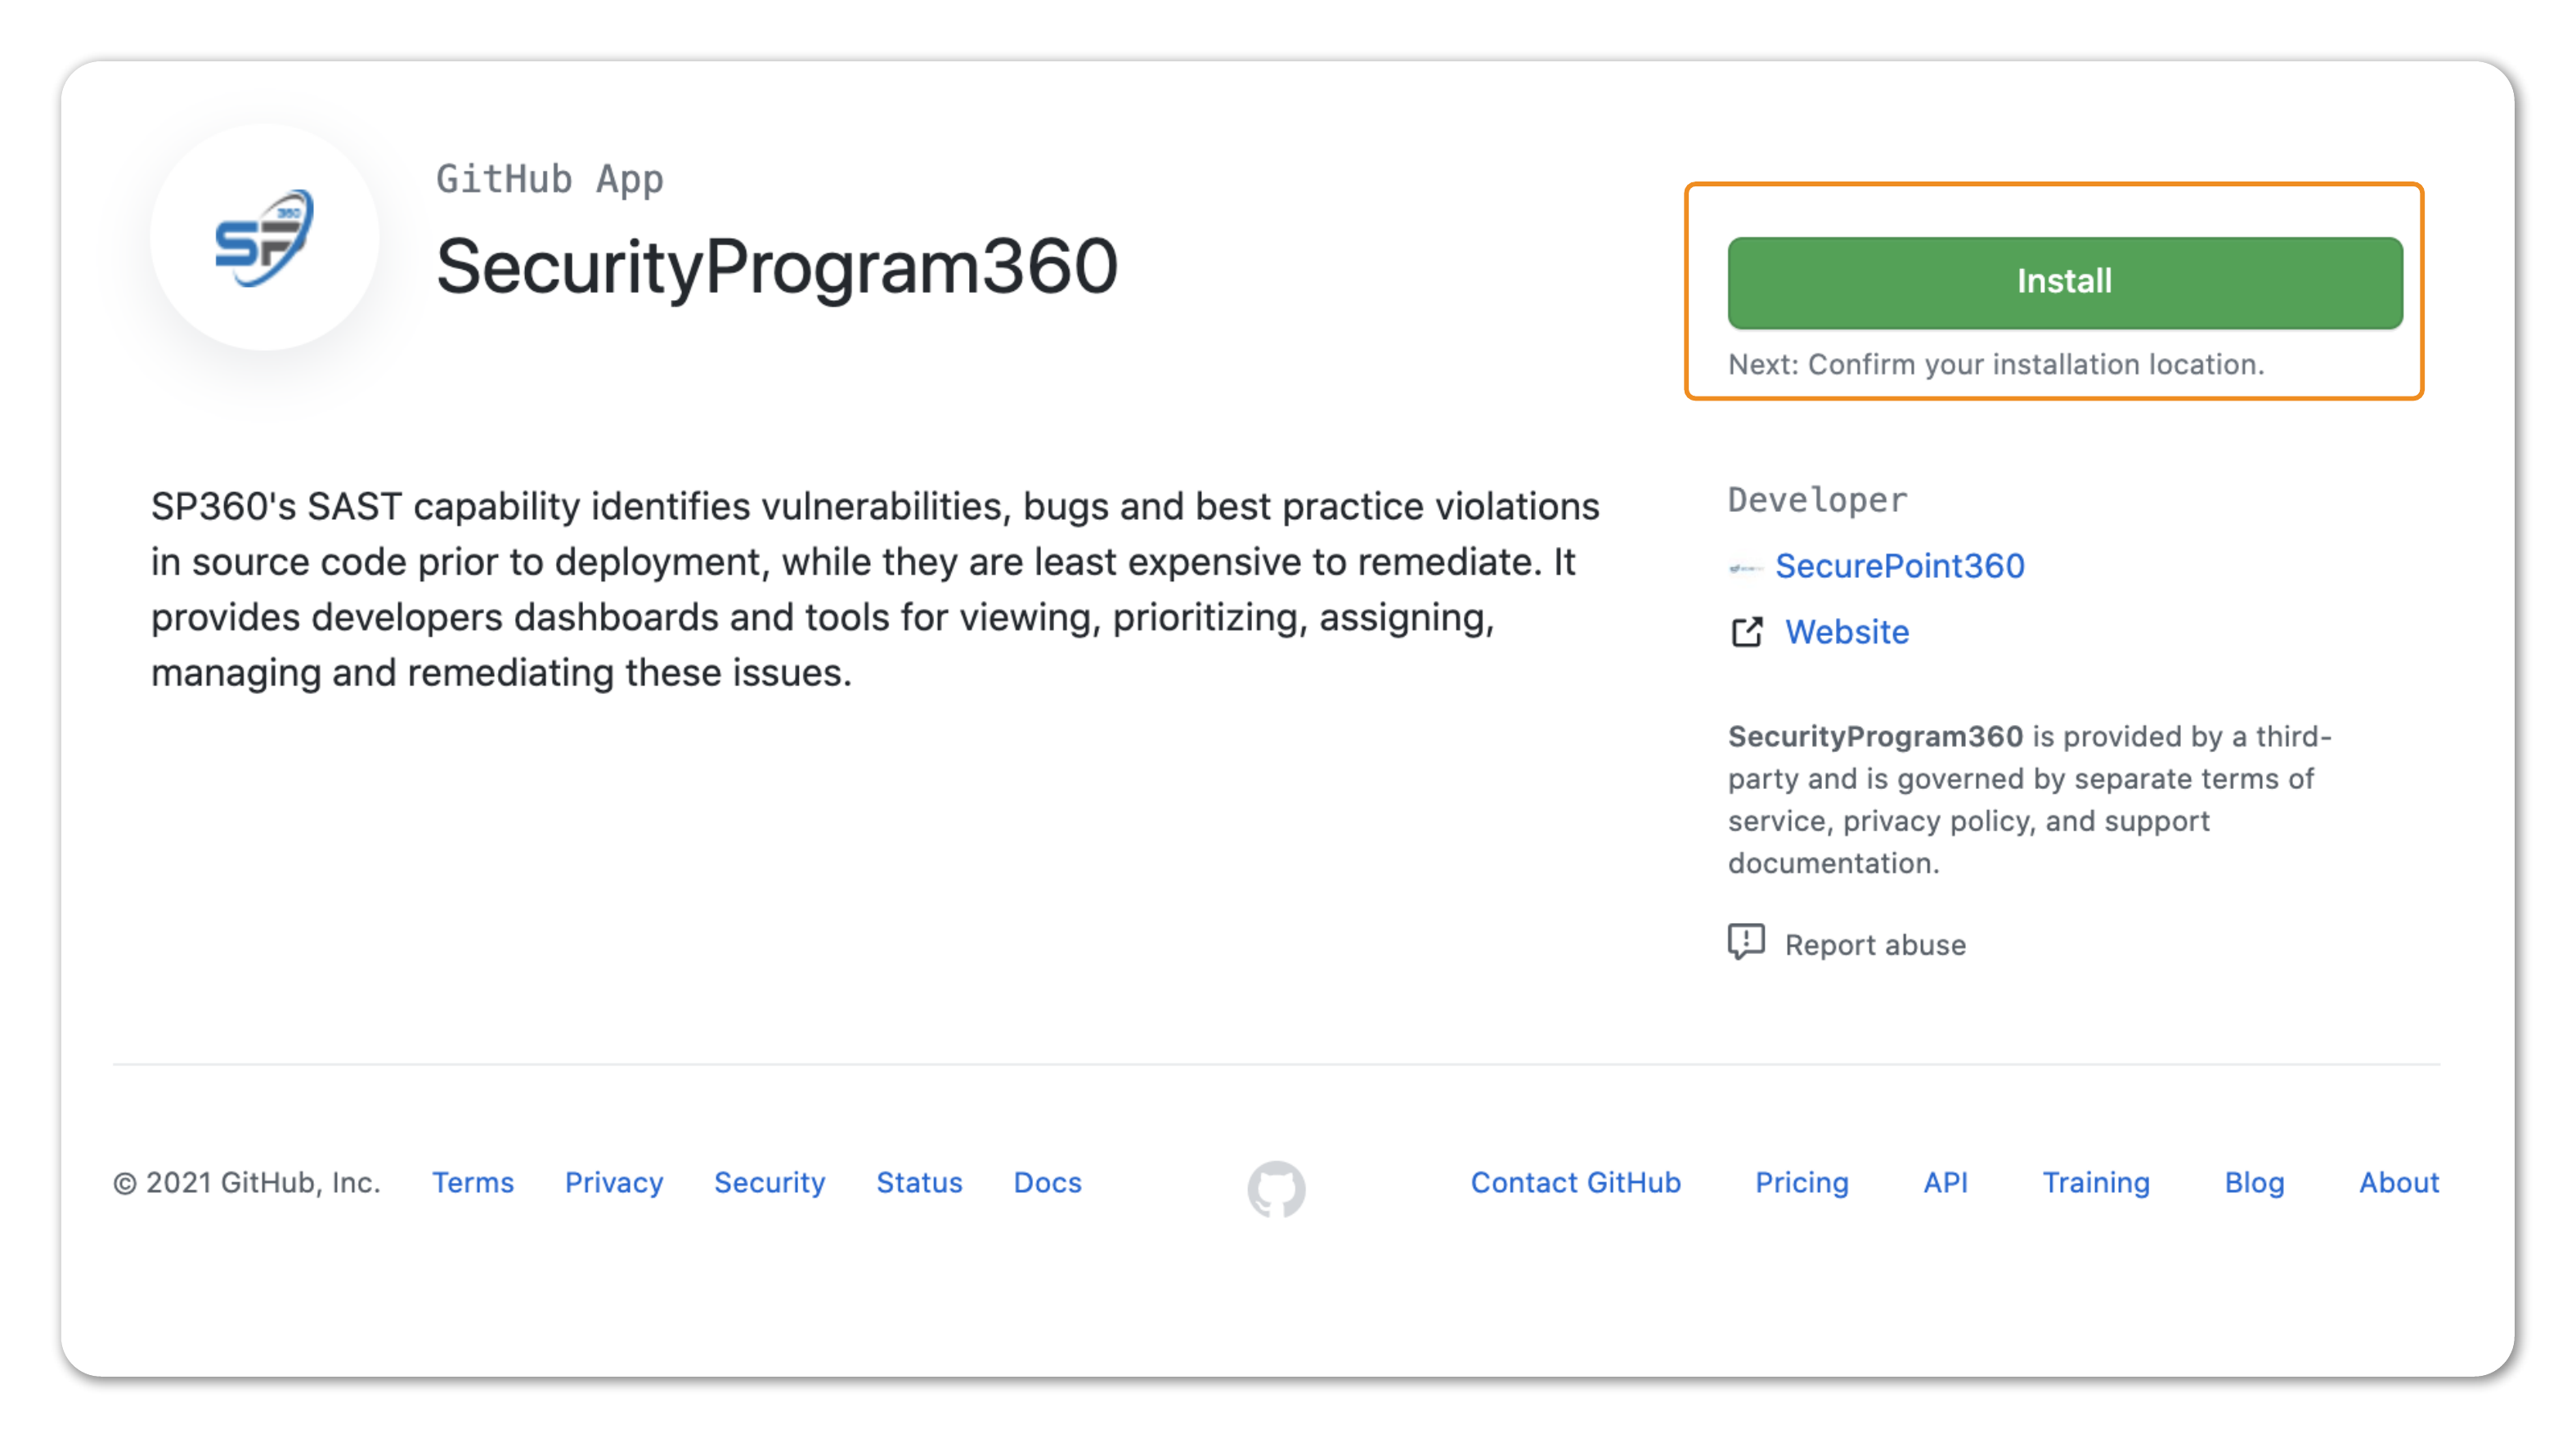
Step 5: Once you click on install, a page will pop up asking you to Install and Authorize Security Program 360.
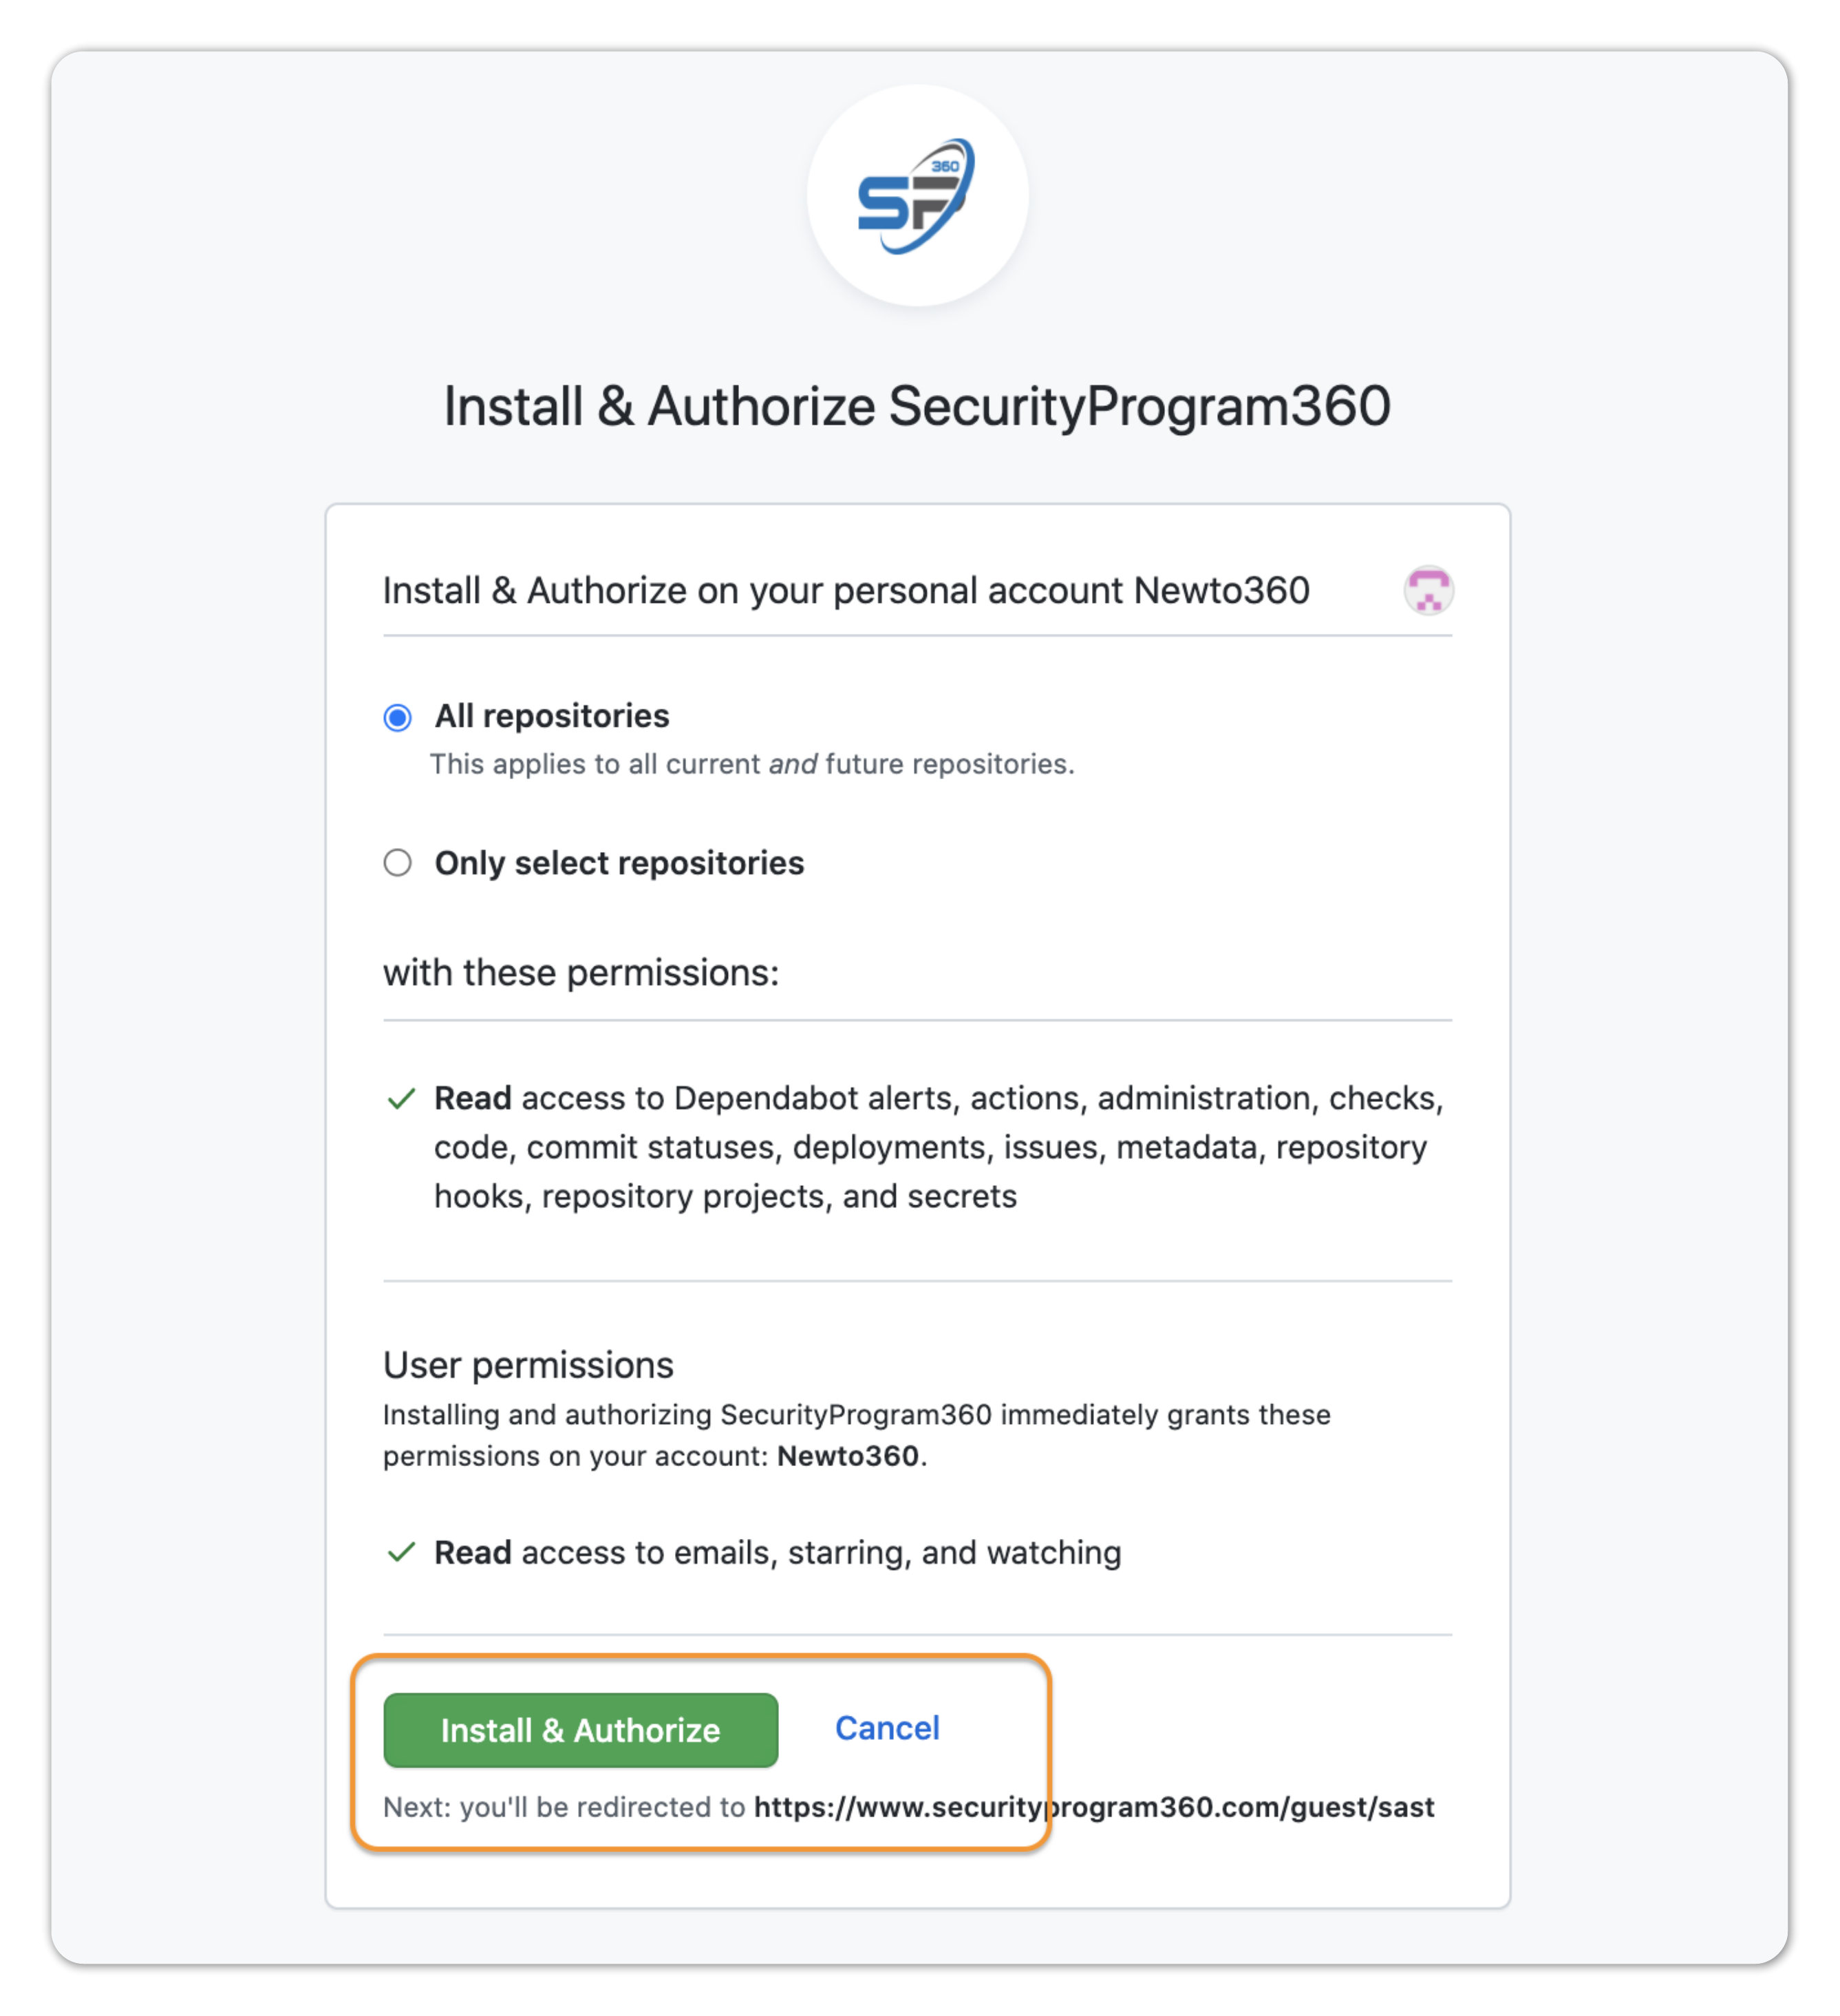
Step 6: If you have multiple organizations within your GitHub account, the following page is displayed, and the appropriate organization must be selected. If you have only one organization then this step will skip automatically.

Step 7: Select the repository (or repositories) that you want to periodically scan. You can select All Repositories or Only select repositories. Once a selection is made, click Save.
To remove previously selected repositories, click on the X icon in front of the repository name.
Step 8: At this point, the SP360 page is displayed showing all repositories added to SP360. A row is added for each selected repository and a drop-down is shown if the repository contains multiple branches. If a branch is not selected, SP360 will scan all branches.

An empty box around the Branch field indicates that no branch was selected. Once a branch is selected, SP360 connects to the repository and its branch(es) and starts scanning.
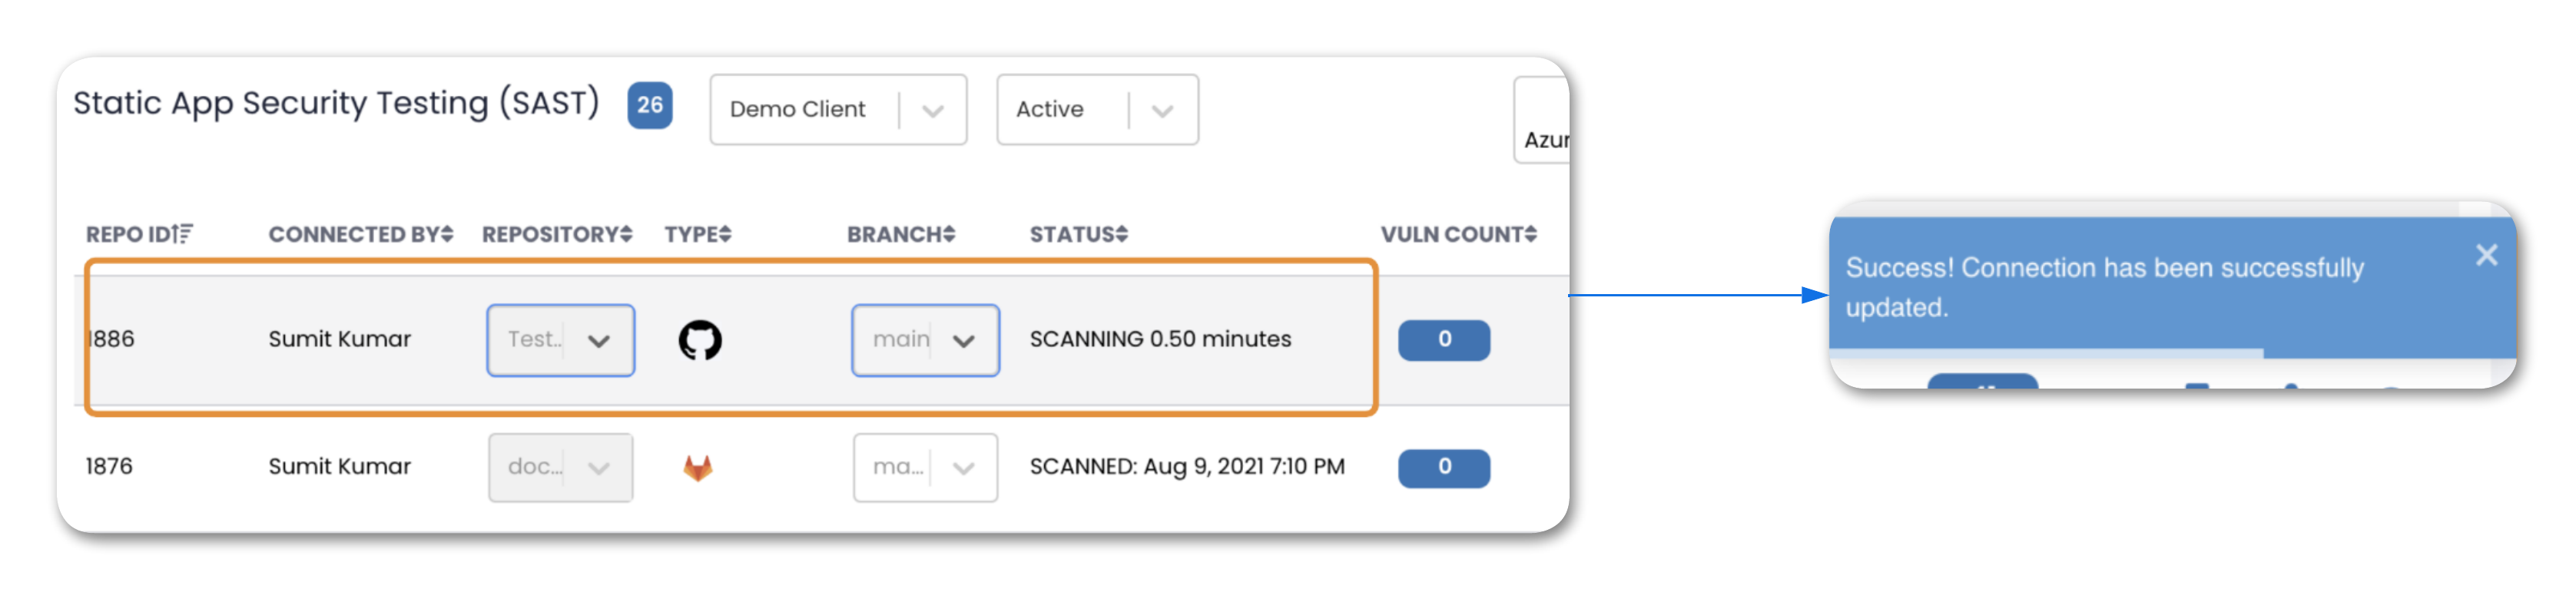
Once the connection to the repository has been established, it will be scanned. This progression is reflected by a series of changes in the repository status starting from “Connecting”, “Connected”, “Scheduled”, “Scanning”, “Synced” to “Scanned”. Once completed. the date and time of the scan is displayed. Also, after the scan is completed, the vulnerabilities, bugs, and unsatisfied best practices found in source code can be explored. For more information on Status Flow Diagram, click here
Supported Actions Once Respository is Connected

Each of the connected Repository has four available action buttons as indicated by the icon on the right side of each line. For more information, click here