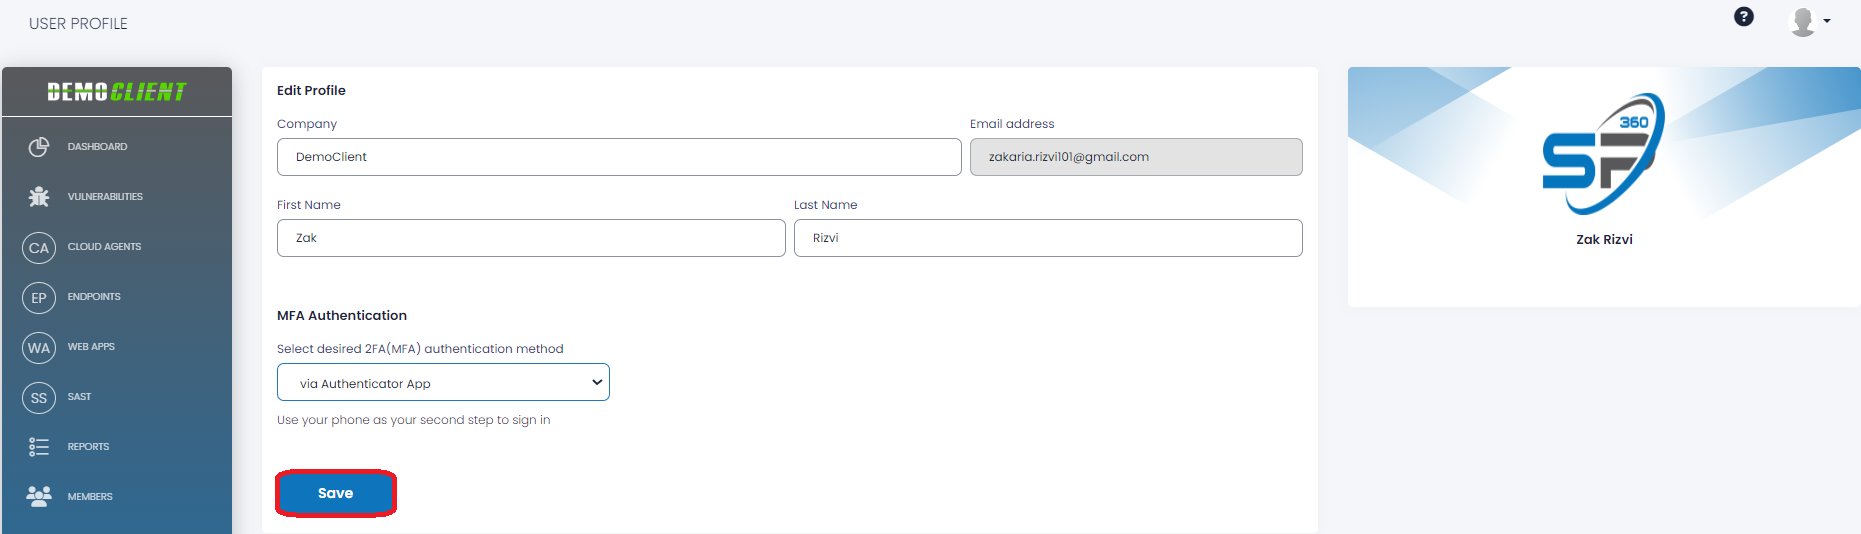
Profile
The Edit Profile page displays important information about the user’s profile and provides functionality to specify the Multi-Factor Authentication (MFA) method utilized (i.e., email or third-party authenticator).
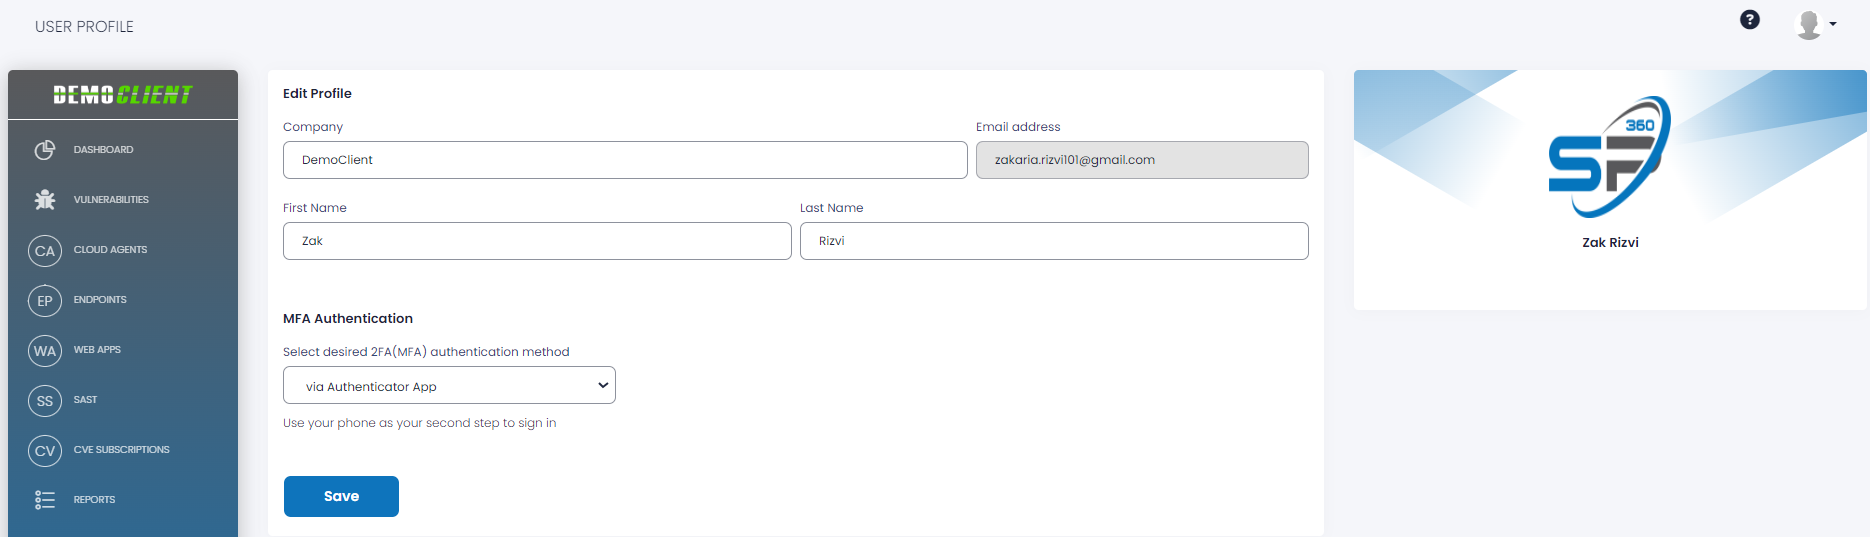
The top section of the Profile page contains the company name, email address, user’s first and last name fields.
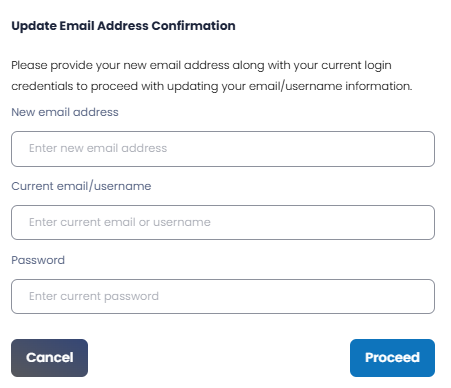
Note: Users can now update their registered email address directly from the Edit Profile page. To do this, click the  button and provide the required details in the Update Email Address Confirmation pop-up window, shown below.
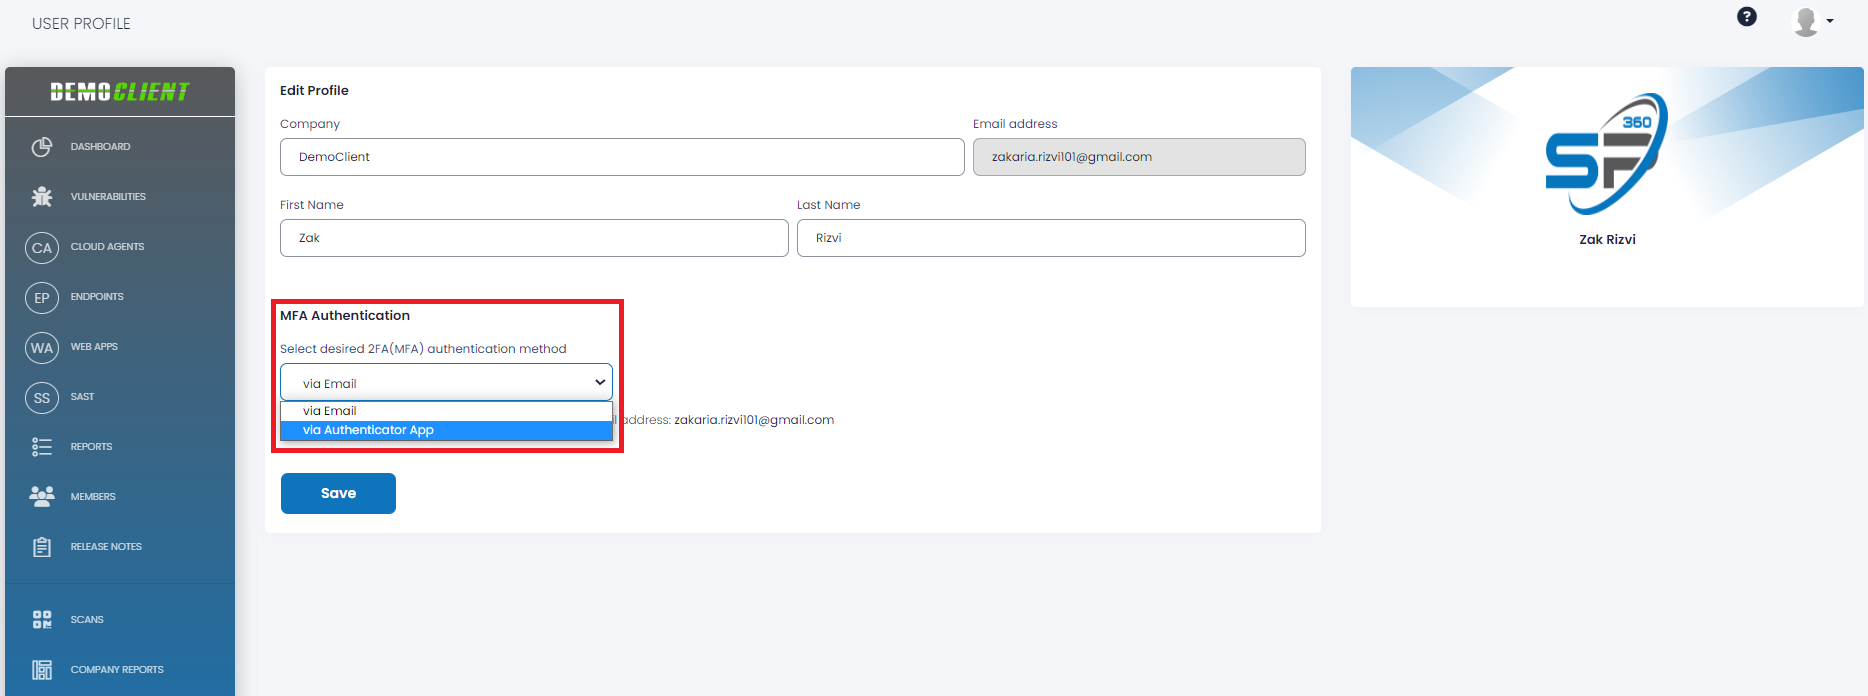
Setting up MFA Authentication
To provide multi-layered protection, SP360 offers MFA by using a second source of validation before granting access to the end users. To setup MFA, the following steps need to be followed.
Step 1: Select the desired Multi-Factor Authentication method from the dropdown menu, as shown below. Available options include via Email and via Authenticator Application.
Note: The SP360 default setting is to receive MFA code via email, unless the user opts for the authenticator application as the preferred login method.
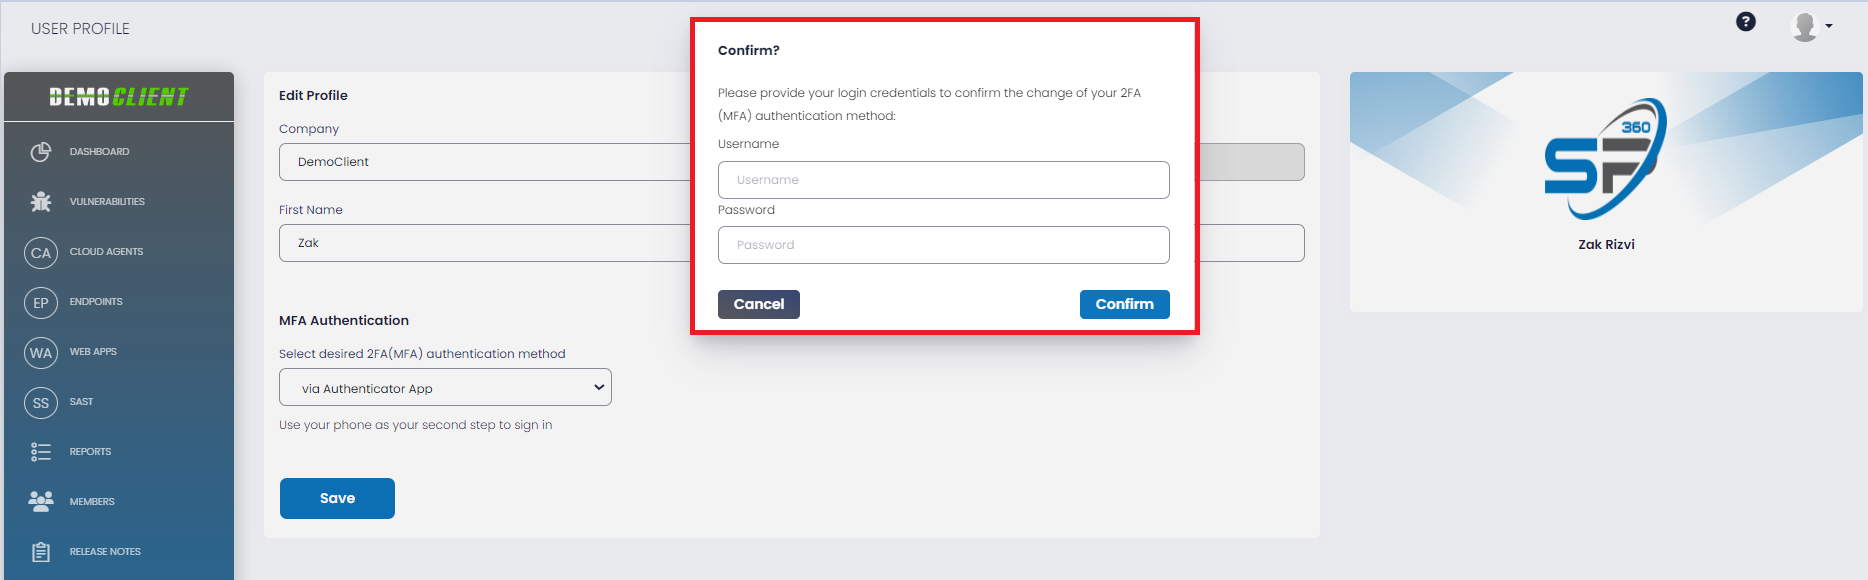
Step 2: Selecting the authenticator application option results in a pop-up confirmation, as shown below. Enter your SP360 login credentials and hit the Confirm button to proceed.
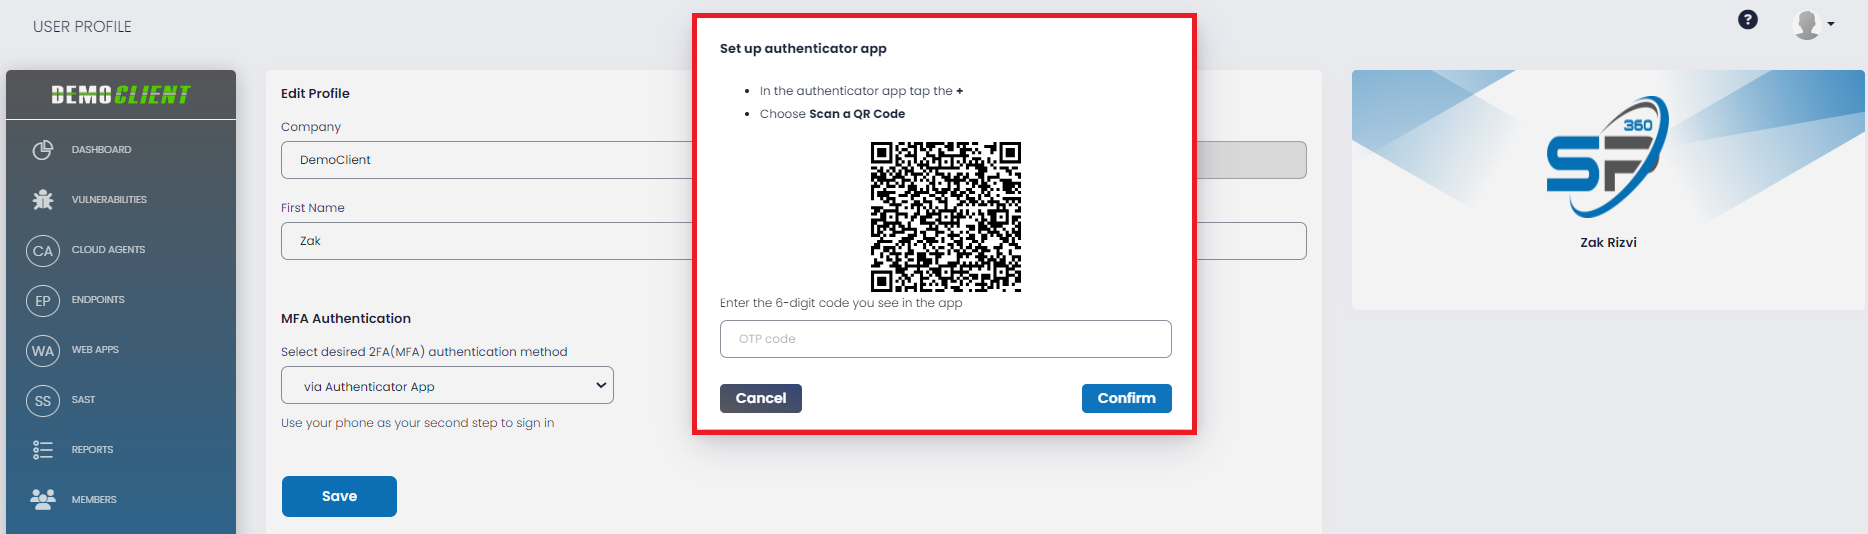
Step 3: A QR code is displayed in a pop-up window, as shown below. Open your desired authenticator application on a secondary device, scan the QR code, enter the 6-digit code you see in the authenticator application, and hit the Confirm button.
Note: SP360 supports all Time-based One-Time Password (TOTP) authenticators, the most popular of which are Google Authenticator, Microsoft Authenticator, Authenticator App, Two-Factor Authentication, and Authy.
Step 4: At the bottom left of the Profile page is a Save button that allows the new settings to take effect.