Members Management
The Members Management page in SP360 primarily allows Admin users to view all or select set of users who have been invited to the platform, and manage and modify their roles, subscription details, and activity status. Individual Members can manage themselves, as well as invite new Members.
The upper left corner of the Members Management page contains a blue box with the number of members meeting your selection criteria, as shown below.
Filtering and Searching Options, and Action Icon
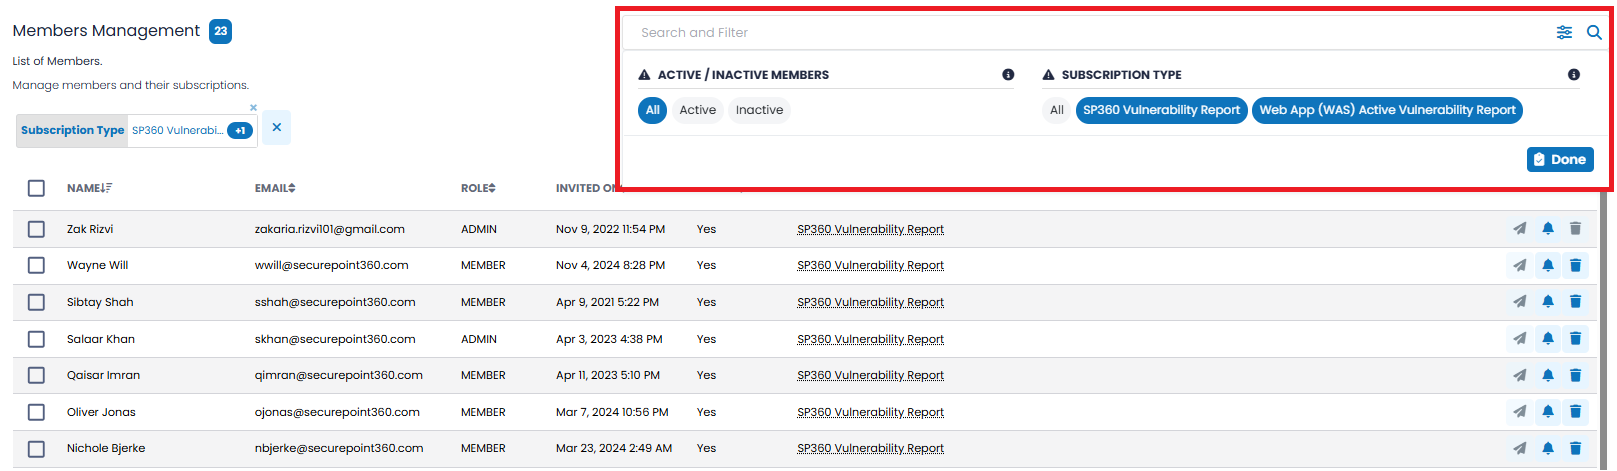
The Search and Filter bar at the upper right of the page allows you to select members based on attributes defined below, as well as by a search string. The bar presents a pull-down list of two additional filtering options with one having multi-select capabilities.
Filtering Options
| Filter Type | Description |
|---|---|
| ACTIVE/INACTIVE MEMBERS |
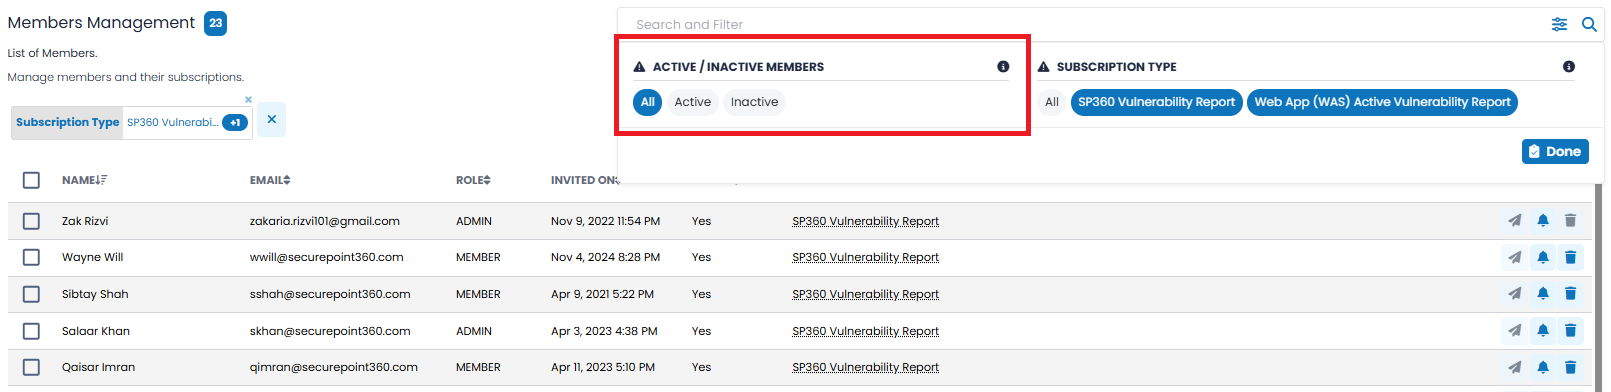
Use this filter to narrow down the list based on account activation status:
This filter is useful for following up on pending invitations or managing active user access. |
| SUBSCRIPTION TYPE |
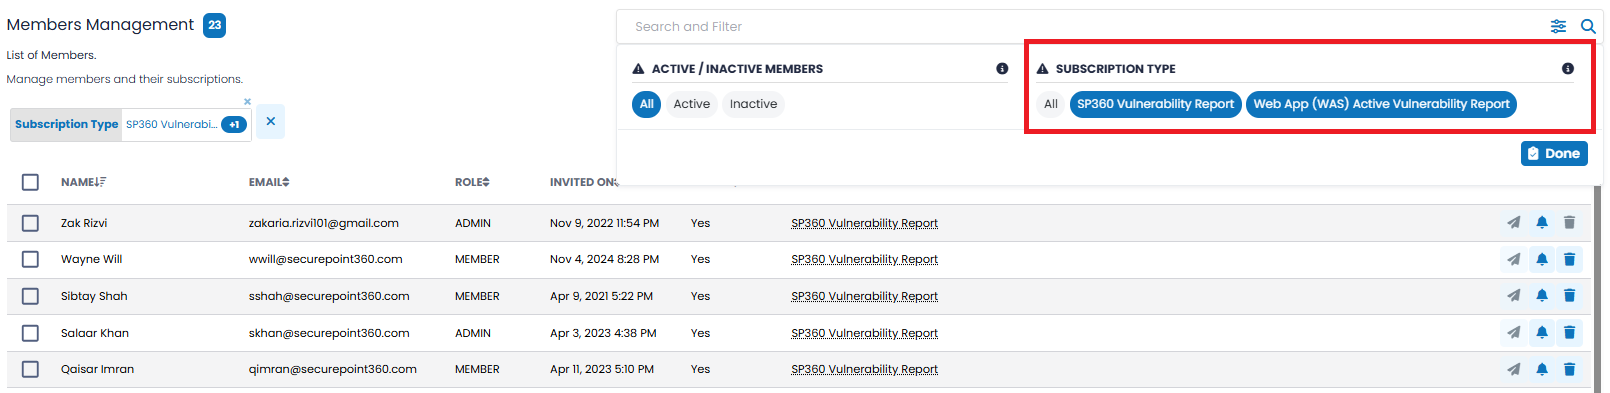
Filter users based on the SP360 Reports they are subscribed to. Available options include:
This filtering option has multi-select capabilities to view users with one or more corresponding report subscriptions. This helps Admins verify subscription access and manage user-level visibility for specific reports. |
Action Icon (Bulk Operation)
The checkboxes on the left allow Admins to select one or more members and apply bulk operations, as explained below. The “Selected” control shows the number of members selected and that will be impacted by any bulk operation.
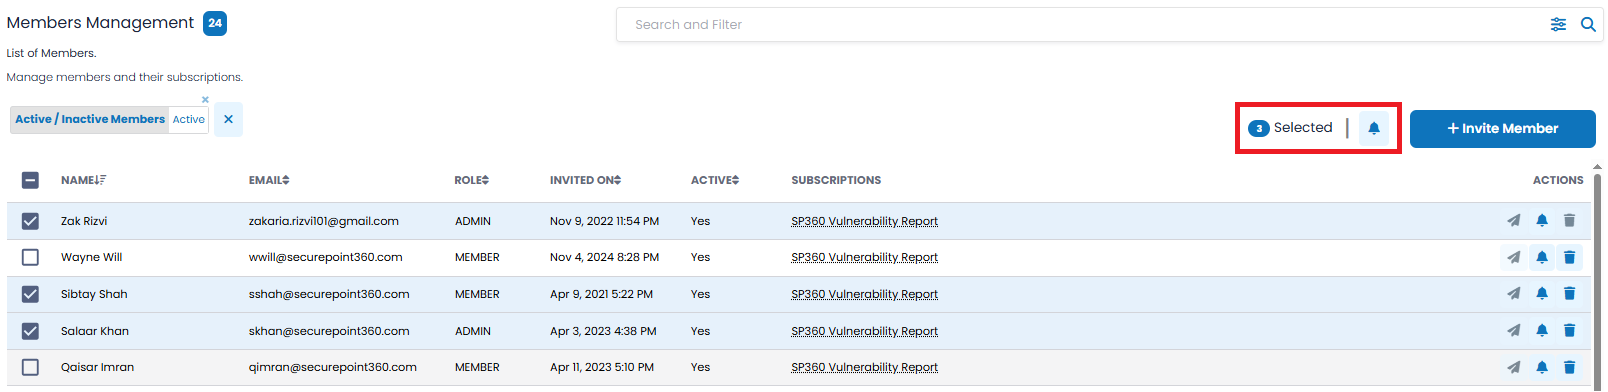
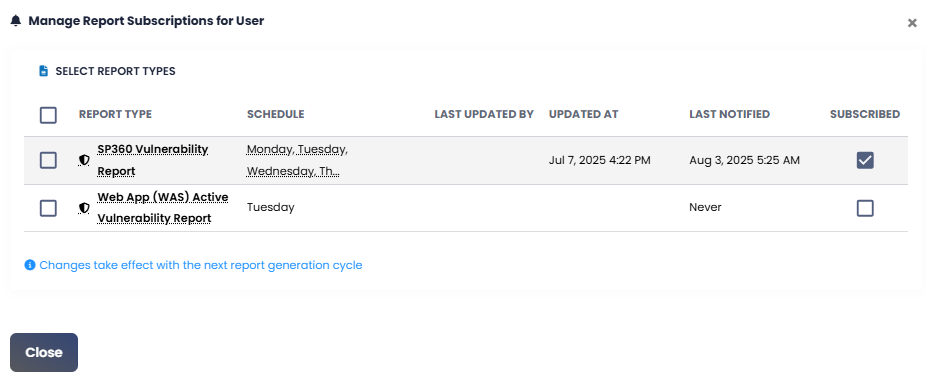
The Members Management page offers one bulk action ( icon). This icon is only visible when one or more members are selected. Click it to bulk manage report subscriptions for the selected members. A pop-up screen will appear, as shown below.
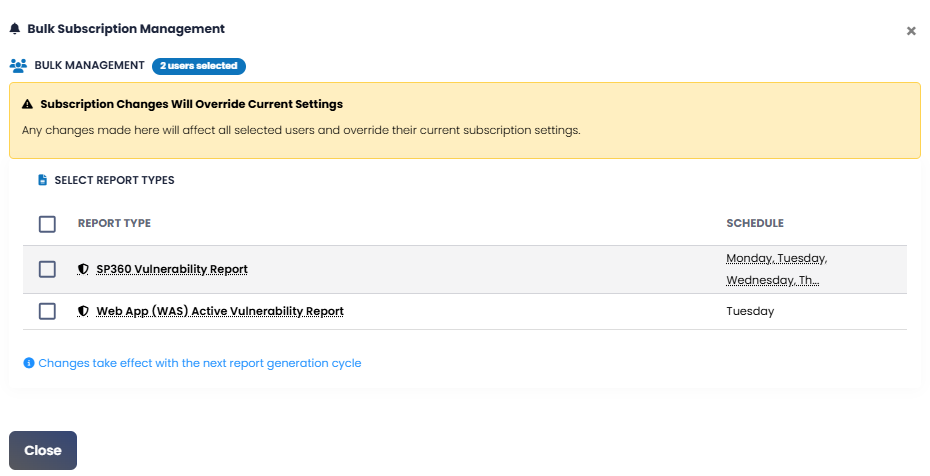
This feature allows Admins to quickly update report subscriptions for multiple users at once. When one or more report subscription types are selected, the Subscribe and Unsubscribe buttons appear, to apply that action for the selected users.
Inviting a New Member
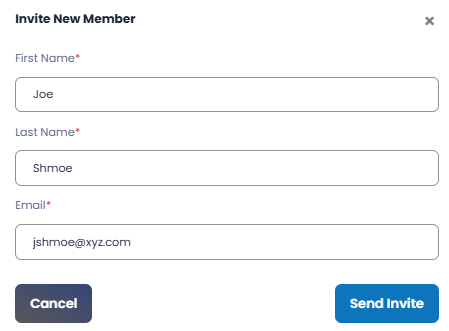
To add a member, click the  button located at the top right of the Members Management page. By default, all invitees are Members. To become an Admin, your SP360 representation will need to assist you. This opens the Invite New Member dialog box, where you will be prompted to enter:
- First Name (required) – the user's given name. This will be displayed in the Members table.
- Last Name (required) – the user's surname or family name.
- Email (required) – the email address to which the invitation will be sent. This will also serve as the user’s login credential.
Inviting an Existing SP360 User to an Additional Tenant
SP360 supports inviting a user who already exists into another tenant (for example, when an organization operates multiple business units). Admins invite the user in the same way as a new member – by entering their First Name, Last Name, and, most importantly, their email address. SP360 automatically recognizes the user when the email address already exists in the system.
When this occurs:
- The user is not shown any additional UI dialog during the invitation process.
- After the Admin submits the invitation, the standard “Successfully Invited” confirmation message appears.
- The user is automatically accepted into the new tenant. Unlike new invitations, there is no 21-day pending acceptance period, and no reminder emails are sent (new invitation features are explained further below in the help).
- The user receives an email notification informing them that they have been added to another tenant.
- The user can switch between tenants by clicking the selector logo in the upper-left corner (as shown below) and choosing the desired tenant.
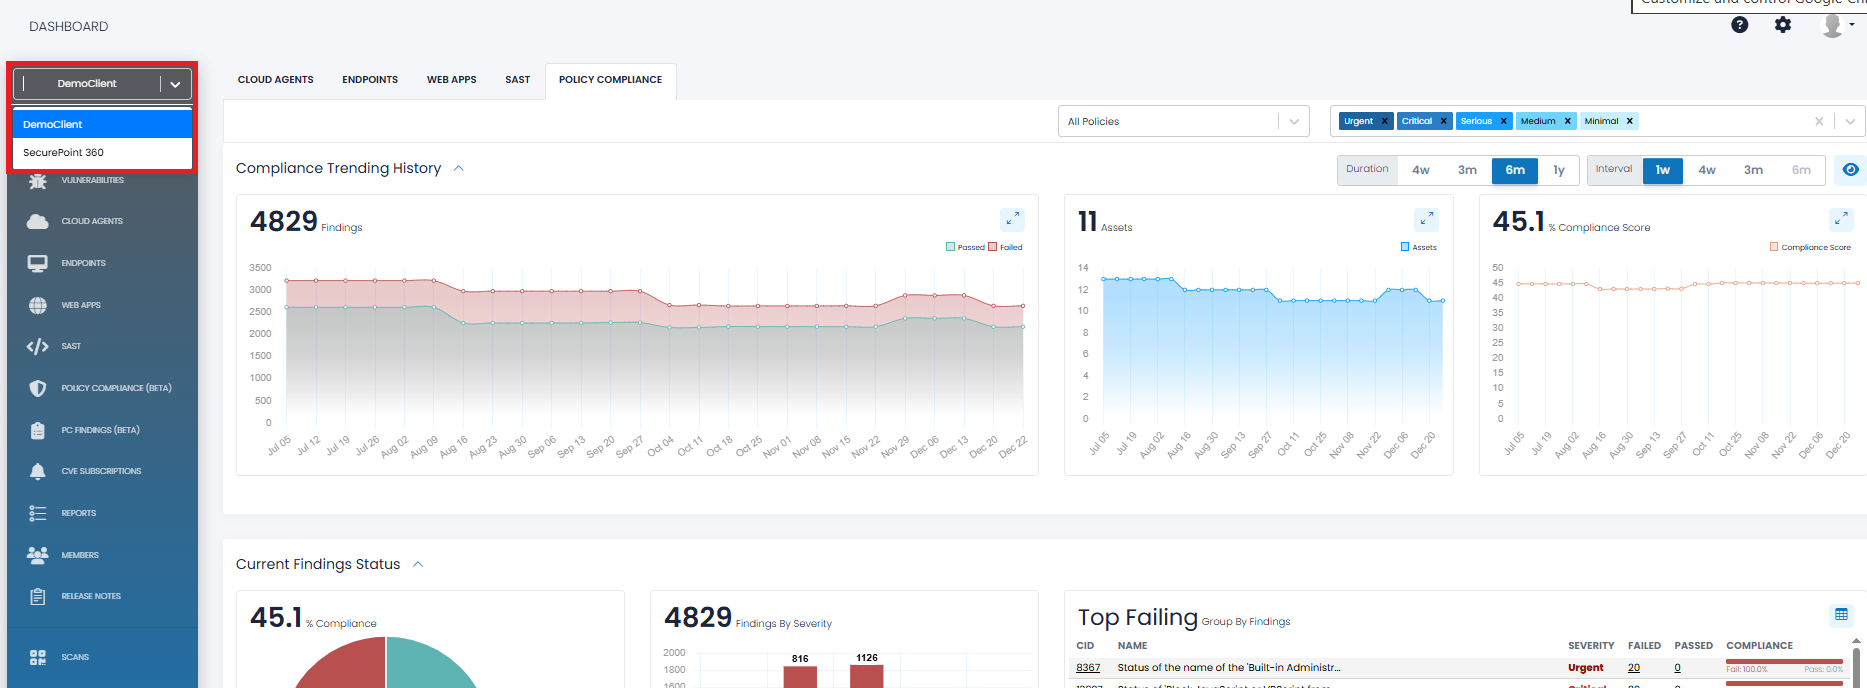
This workflow allows existing SP360 users to be added to additional tenants efficiently, without requiring them to re-register or manually accept a second invitation.
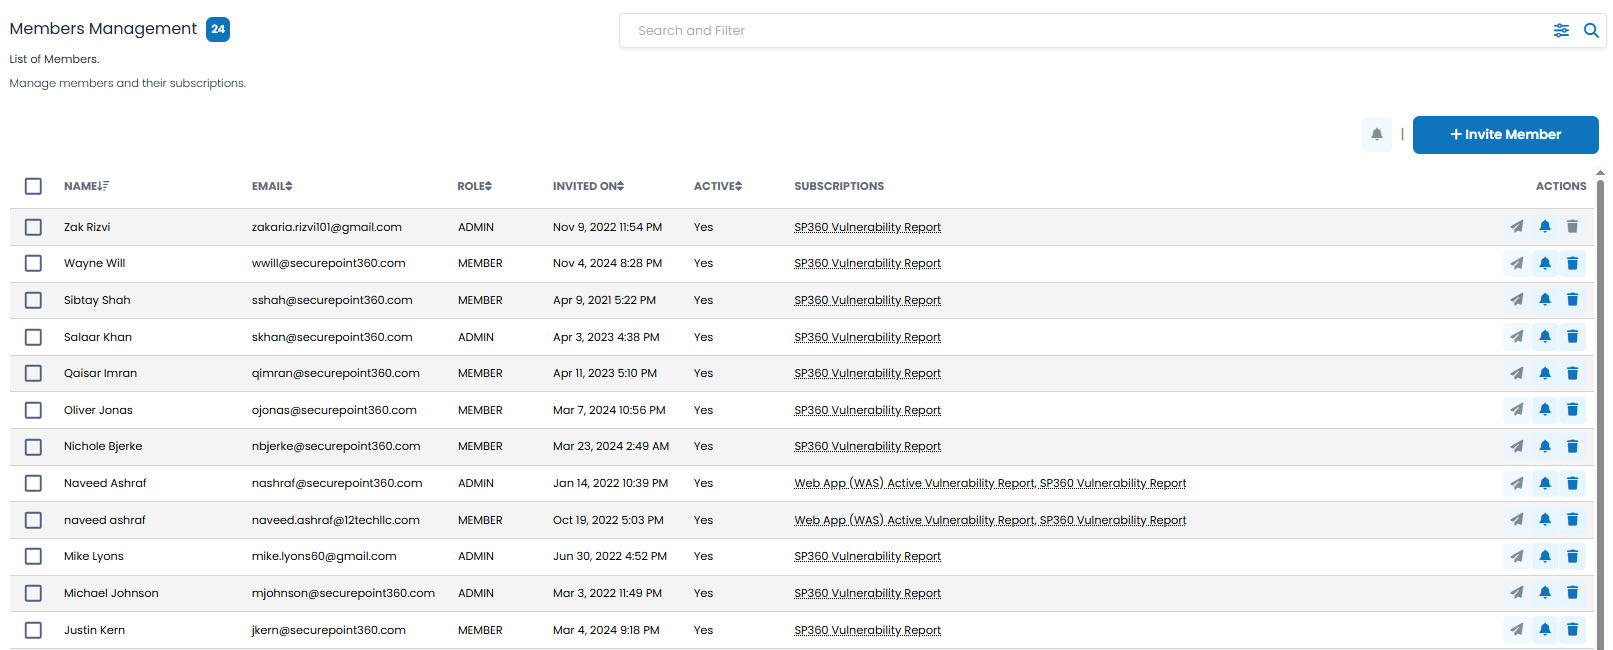
Members Management Grid
The Members Management grid includes the following fields.
| Column Headers | Definition |
|---|---|
| NAME | Displays the full name of the user. |
| Shows the email address associated with each user’s SP360 account. | |
| ROLE | Indicates the user’s assigned role: either ADMIN or MEMBER. Admins have elevated privileges, which includes (a) managing other users accounts (e.g., subscribe them to reports), and (b) deleting other users. |
| INVITED ON | Timestamp showing when the user was first invited to the SP360 platform. |
| ACTIVE | Reflects whether the user has activated their account. Only users who have accepted the invitation appear as Yes under this column. |
| SUBSCRIPTIONS | Lists the SP360 reports each user is subscribed to, such as the SP360 Vulnerability Report, Web App (WAS) Report, or Policy Findings Report. If a user has multiple subscriptions, they are shown as comma-separated links with hover text. |
Each Member row has three row-level action icons on the right side of each line.
| Icon | Description |
|---|---|
 Resend Invite | Click on this icon to resend the invite to a member already added in a client. This is typically used when the user’s invitation has expired due to non-acceptance. Invitation links expire after 21 days, with two intermediate reminders automatically sent at 7 and 14 days. [Note: This icon is greyed out if the user is already active.] |
 Manage Subscription | Clicking on this icon displays a pop-up window in which you can manage SP360 report subscriptions for yourself. It allows Admins to view and modify the specific report subscriptions assigned to other users.
|
 Delete Member | Clicking on this action icon opens a confirmation pop-up allowing Admins to permanently remove a user from the platform, as shown below.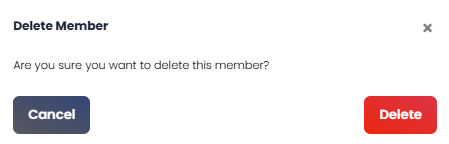 |